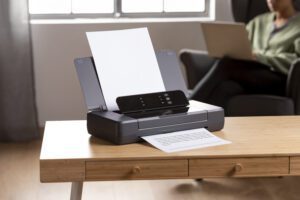

How to Connect a Printer to Your Computer
Connecting a printer to your computer seems simple at first, but many people run into problems. Do you struggle to get your new printer to work? Whether you’re at home or in an office, knowing how to make this connection smoothly saves time and frustration. This guide walks you through every step, from choosing the right setup to solving common issues, for both Windows and Mac users.
Understanding Printer Types and Connection Methods
Overview of Printer Types
Printers come in different styles, each suited for specific needs:
- USB Printers: These are the most common and easy to set up. Usually, connect directly to your computer with a cable. Ideal for home use or small offices.
- Network Printers: These connect via a wired Ethernet cable or Wi-Fi. Great for offices with multiple computers sharing one printer.
- Wi-Fi Printers: Wireless printers that connect to your Wi-Fi network, making them easy to place anywhere in the house or office.
- Bluetooth Printers: Portable printers that pair with your computer or phone without wires. Useful for printing on the go.
Common Connection Methods
Choosing the right connection depends on your environment and the printer’s features:
- USB Connection: The simplest way to connect, requiring only a cable. However, it limits the printer’s placement because you’re tied by the cable length.
- Network Connection: Offers two options—wired Ethernet or Wi-Fi. Wired is more stable but less flexible. Wireless is more convenient but may need troubleshooting.
- Bluetooth Connection: Best for small, portable printers. No internet needed, just a quick pairing process.
Pick the method that fits your setup to make printing easier.
How to Connect a Printer to Your Windows Computer
Connecting via USB
Getting a USB printer going is straightforward. Follow these steps:
- Power off your printer.
- Plug the USB cable into your printer and computer.
- Turn on the printer.
- Windows will detect the device automatically or prompt you for drivers.
- If needed, download the latest driver from the printer manufacturer’s website.
- Follow on-screen instructions to complete setup.
Troubleshooting tip: If your PC doesn’t recognize the printer, try a different USB port or cable. Ensuring your drivers are up to date often solves connection issues.
Connecting to a Network Printer
Setting up a Wi-Fi Printer
Here’s how to connect your Wi-Fi printer:
- Using the printer’s menu, connect it to your Wi-Fi network. Check the user manual for specific steps.
- On your Windows computer, go to Settings > Devices > Printers & scanners.
- Click Add a printer or scanner.
- Windows scans and displays available printers. Select your Wi-Fi printer.
- Follow prompts to install drivers if needed.
Configuring a Network Printer via IP Address
When the printer doesn’t show up automatically, add it manually:
- Find your printer’s IP address from its menu or network settings.
- Open Control Panel > Devices and Printers.
- Click Add a printer and select The printer I want isn’t listed.
- Choose Add a printer using a TCP/IP address or hostname.
- Enter the IP address and follow instructions to finish setup.
Note: For network printers, ensure your computer and printer are on the same network to avoid connectivity issues.
Setting a Printer as Default on Windows
To avoid selecting the wrong printer each time:
- Go to Settings > Devices > Printers & scanners.
- Select your preferred printer.
- Click Set as default.
- Your PC will now use this printer automatically unless you choose otherwise.
How to Connect a Printer to Your Mac
Connecting via USB
Setup on a Mac is similar:
- Turn on the printer, connect it to your Mac using a USB cable.
- macOS might install drivers automatically. If not, visit the manufacturer’s website for support.
- Open System Preferences > Printers & Scanners.
- Click + to add your printer if it doesn’t appear.
- Select it from the list and follow prompts.
Connecting to a Wi-Fi Printer
Using AirPrint (for compatible printers)
AirPrint makes wireless printing effortless:
- Make sure your printer supports AirPrint and is connected to Wi-Fi.
- On your Mac, open System Preferences > Printers & Scanners.
- Click + to add a new printer.
- Look for your printer in the list with AirPrint beside it.
- Select it and press Add.
Manual Setup with IP Address
If your printer isn’t AirPrint-compatible:
- Find the printer’s IP address via its menu or network settings.
- Open System Preferences > Printers & Scanners.
- Click + to add a printer.
- Choose IP tab and enter the IP address.
- Select the proper driver or choose Generic PCL.
- Confirm and finish setup.
Setting a Default Printer on Mac
Change default printer easily:
- Open System Preferences > Printers & Scanners.
- Right-click (or Control-click) on your preferred device.
- Choose Set as default printer.
- Your Mac will prioritize this device for printing tasks.
Additional Tips for Smooth Printer Connectivity
- Always keep your device drivers and printer firmware updated for the best performance.
- Restart your printer, router, or computer if you experience persistent connection issues.
- Secure your Wi-Fi printer with a password to avoid unauthorized access.
- Use support tools provided by the manufacturer for troubleshooting, like HP Smart or Epson Connect.
- If problems persist, don’t hesitate to contact technical support for personalized help.
Conclusion
Connecting your printer to a computer isn’t complicated if you follow the right steps. Focus on choosing the correct connection type—USB, Wi-Fi, or Bluetooth—and ensure your drivers are up to date. For Windows users, adding a network printer via IP address gives a reliable setup. Mac users benefit from AirPrint for simple wireless printing or manual IP setup otherwise. Keep this guide handy – it’s a quick reference for future printer setups and troubleshooting. Always update your device drivers and firmware to keep everything running smoothly. Happy printing!