
To get started creating a new custom plugin, please follow the following below steps :
- Go to WordPress installation’s wp-content directory.
- Open the plugins directory.
- Create a new directory and name it (e.g. custom plugin).
- Create a new PHP file (it’s also good to name this file, (e.g. custom-
plugin.php).
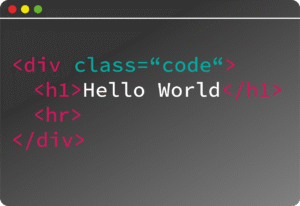
    <?php
    /**
     * Plugin Name: custom plugin
     * Description: A brief description.
     * Version: 1.0.0
     * Author: custom plugin comic
     * Author URI: Your Website URL
     */
Adding Functionality:
- PHP Code : Write your plugin’s core functionality within the file, using PHP code.
- Functions and Classes : You can define functions or classes to handle your plugin’s logic.
- WordPress Hooks and Filters : Use WordPress hooks and filters to integrate your plugin’s functionality into WordPress core processes.
Enqueueing Styles and Scripts:
- Separate Files: If you requires custom CSS or JavaScript, create separate stylesheet and script files in you folder.
- Enqueue Function: Use the
wp_enqueue_style()andwp_enqueue_script()functions to load these files on specific pages or locations.
Testing and Debugging:
- Activation: Activate through the WordPress dashboard’s Plugins section.
- Testing: Test the plugin’s functionality thoroughly, ensuring it works as expected and doesn’t conflict with other plugins.
Advanced Features (Optional):
- Admin Pages: Create custom admin pages within the WordPress dashboard to allow users to configure.
- Shortcodes: Define shortcodes for use in posts and pages to add dynamic content.
- Custom Post Types: Create custom post types to extend WordPress’ content management capabilities.
- Settings: Add settings pages to allow users to configure.
- Database Interaction: If necessary, interact with the WordPress database using
wpdb.
Package and Distribution (Optional):
- Compression: Compress it into a ZIP file for distribution.
- WordPress Repository: You can submit to the WordPress plugin directory.

Preparing for Release
Review your code for bugs or security gaps. Write clear documentation explaining how to set up and use your plugin. Create a detailed readme.txt file for distribution.
Polished, well-documented plugins look professional and get better reviews.
Distributing Your Plugin
Upload your plugin to the WordPress Plugin Repository for wide exposure. Alternatively, share it on your website or other marketplaces to reach your audience.
Ensure your plugin follows WordPress standards for easier approval.
Conclusion
Building a custom WordPress plugin involves planning, coding, testing, and maintaining. Start with clear goals, organize your files well, and secure your code. Test thoroughly to catch issues early.
Creating tailored tools can give your website a unique edge and improve its performance. Keep learning, stay organized, and engage with the WordPress community. With time, you’ll craft plugins that power better websites and serve your needs perfectly.